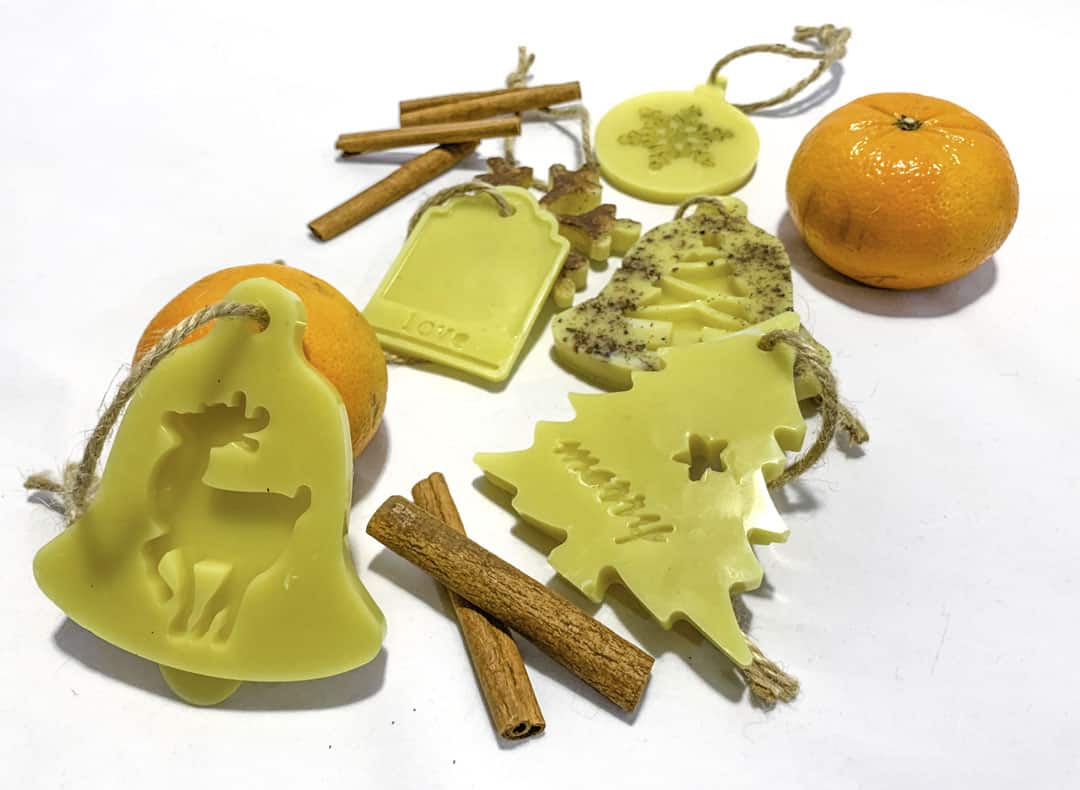
Fall in love with these beeswax Christmas ornaments and make yours today
The holiday season is here, which means more exciting and beautiful DIY projects we can work on.
Do you like natural unique Christmas decorations? Say YES and learn to make beautiful beeswax ornaments today.
Using beeswax for Christmas decoration is actually an old, vintage tradition. It’s believed that german bakers poured beeswax into their cookie molds, then colored and painted them to create the final product.
Lucky us, we can follow their steps and make some for our holidays. These beeswax ornaments can be used not only on the tree but to hang them on your windows or make garlands. They are perfect little handmade gifts too.
Please note that this article contains affiliate links. Please see my full disclosure and privacy policy for more info.
DIY beeswax ornaments supply list
- Beeswax. My favorite is from Beeswork. They are small yellow pellets, and I used them to make candles and natural furniture polish.
- Christmas silicone mold set. I chose these because they come with a hanging hole. Perfect for ornaments, jewelry making, and other craft projects.
- Ribbon or jute twine.
- Double boiler. I dedicated this pourer for my wax crafts and placed it in a bigger cooking pot creating the double boiler effect.
- vegetable spray for preparing your mold
What mold is the best for this DIY?
I really think the silicone molds are the best for this beeswax craft. It is flexible and makes it easy to pop the finished ornament out of it. The solidified wax would not stick to it, so that you can skip the preparation with the vegetable spray.
But if you are a baker and already have molds at home, it really doesn’t matter. You can use your favorite brown bag cookie, or clay, or a heavy-duty mold.
Just make sure that you spray vegetable oil in it and let it sit a little bit before you pour the melted wax.
Beeswax ornaments recipe ideas
Here are some spicy and scented ideas to get into Christmas Spirit.
Cinnamon beeswax ornaments: I love cinnamon, cloves, and orange smell every day, but around Christmas time, it feels even cozier and relaxing when these scents are in the house.
- beeswax
- cinnamon
- clove
- sweet orange essential oil
Scented beeswax ornaments:
You can make a joyful holiday blend. The best oils for scented ornaments are frankincense, myrrh, pine, cypress, nutmeg, clove, cinnamon, fir, and peppermint.
- Beeswax
- your choice of essential oil blend.
When making your ornaments, you’ll want to add the oils after you’ve melted the wax. This way, you avoid overheating the oil and losing its scent.
It is a good rule of thumb to mix 6-10% of the overall weight of your wax. You can always add a little more if you think the scent is not strong enough.
Extra tip to mix essential oils in your beeswax: They vary in strength. For example, peppermint might overpower pine.
Beeswax ornaments step-by-step
All right! We got to the fun part!
Get all the materials and tools together and enjoy this craft.
Your kids can help you too. Just make sure they know they are working with hot wax.
1st Step. Melt the wax
I wanted to try both colors and made 1st set with white and the 2nd set with yellow pellets.
- Measure the beeswax into the pouring pot.
- Heat the water in a saucepan.
- Place the pouring pot with the wax in the water and stir the wax until it is completely melted.
Beeswax melting point is relatively low, around 147 F. This means you don’t want to overheat it because it will cause discoloration and turn dark.
Tip: Dedicate one pot for this beeswax craft. After the ornament DIY, you won’t be able to use that pot for cooking anymore.
2nd Step. Add essential oils and spices.
Add the oils and stir the mixture together.
If you decide to use ground cloves and cinnamon, place them into the mold before the next step.
You can mix dried flowers in the wax too.
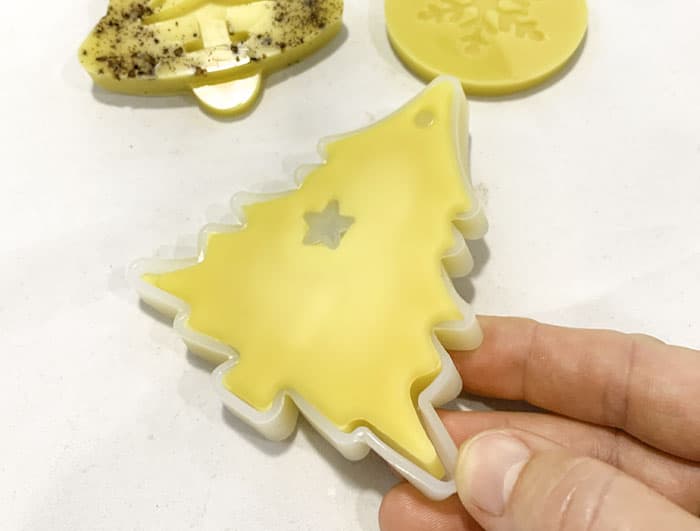
3rd Step. Pour the mix into the mold.
- Prepare your mold with vegetable spray. This will help the beeswax ornaments to pop out easily once they are solid.
- Pour the melted wax into the mold while making sure the wax doesn’t go over the edges.
- Place the mold in a place where nobody will touch it for a while.
Tip: to avoid cracking while the beeswax is cooling, wrap the molds in a cloth. This will help to slow down the cooling process and balancing out the temperature difference.
4th Step. Remove beeswax ornaments from the mold.
After half an hour, you can take a look at the ornaments if they solidified already.
Wax gets lighter and opaque in the cooling process, which gives you a good sense of when you can remove them from the mold.
Carefully pull the wax out of the mold.
5th Step. Add ribbon or jute twine.
- Cut the ribbons or twines about 12 inches long.
- Loop one end of the twine through the hole.
- Tie the ends into a knot.
That’s it! Decorate the Christmas tree or your windows and enjoy the beautiful holiday scent!
How to make beeswax ornaments experience
I loved loved this easy and fast DIY.
The silicone molds worked great! It was easy to remove them from the beeswax ornaments without damaging the shape of the ornaments. I didn’t even have to prepare the molds with vegetable spray.
You can make yellow and white ornaments using beeswax or soy wax.
Think outside of the box. You can put dried flowers, ground cloves, and cinnamon in the melted mix or into the mold before pouring the wax in it.
Pour essential oils in the melted beeswax to have a beautiful Christmas smell around the house.
Making Christmas ornaments is fun, and your kids should be part of it but remember you are dealing with a hot stove, pots, and hot melted wax. An adult would supervise this DIY project.
If you like natural Christmas decorations, beeswax, and wood slice ornaments DIY together are the perfect crafts for you!
Other creative beeswax uses
- Beeswax candles
- Lip balms
- Natural wood furniture polish
- Reusable food wraps
- Organic soaps
Don’t forget to PIN it and come back for the step-by-step instructions. Happy crafting!


I absolutley love this idea. Beeswax smells so good to begin with, and adding those Christmas scents? Must smell amazing!
I love this idea! It’s so fun to make something traditional that you can gift. I bet the orange and cinnamon smells amazing. Thanks so much the the great idea!
This is such a lovely project! I have added it to our round-up, 30+ Ultimate DIY Christmas Teacher Gifts. You can view it here if you wish, https://www.diythought.com/30-ultimate-diy-christmas-teacher-gifts/ Thank-you, and have a great Christmas!